In this guide we will go over how to install Home Assistant on a Raspberry PI.
Hardware
Table of Contents
- Raspberry Pi 4 (Raspberry Pi 3 Model B is ok too, but the Model A does not have enough RAM).
- Power Supply for Raspberry Pi
- Micro SD Card. Ideally get one that is Application Class 2 as they handle small I/O much more consistently than cards not optimized to host applications. A 32 GB or bigger card is recommended.
- SD Card reader. This is already part of most laptops, but you can purchase a standalone USB adapter if you don’t have one.
- Ethernet cable. Required for installation. After installation, Home Assistant can work with Wi-Fi, but an Ethernet connection is more reliable and highly recommended.
Software
Raspberry Pi Imager
Raspberry Pi OS – Raspberry Pi this is all you would need to get started.
WRITE THE IMAGE TO YOUR SD CARD
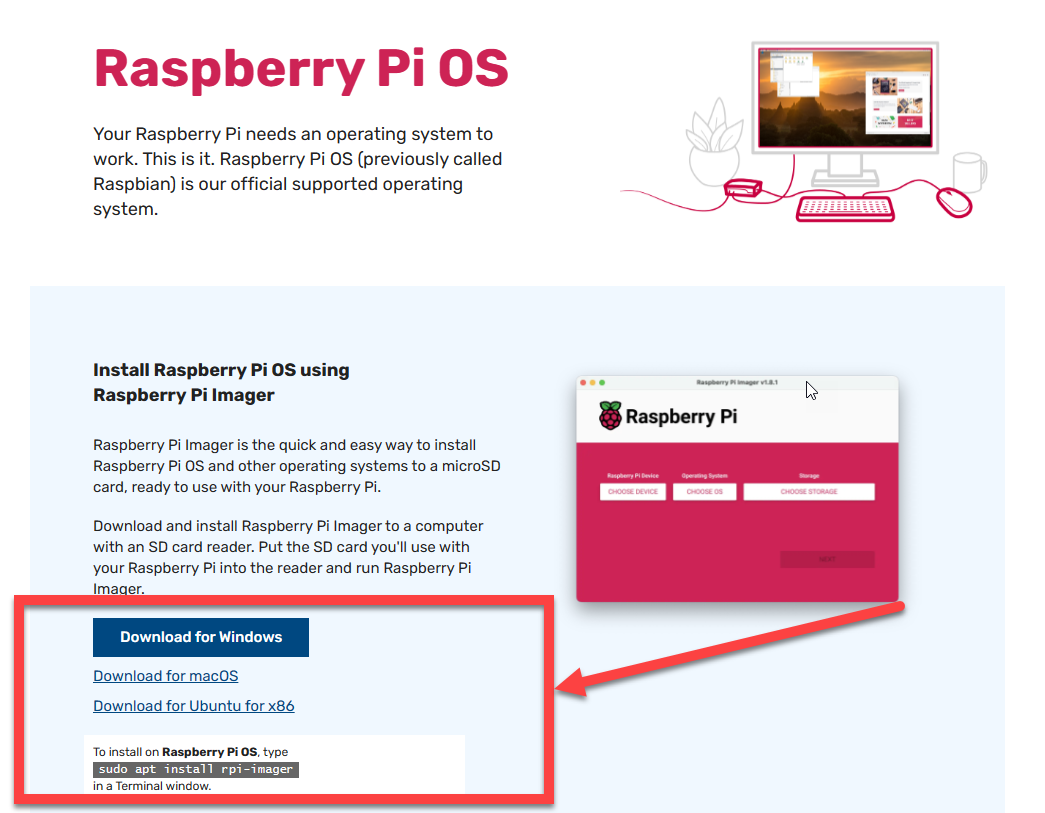
- Head over to https://www.raspberrypi.com/software/ and download and install the Raspberry Pi Imager on your computer as instructed.

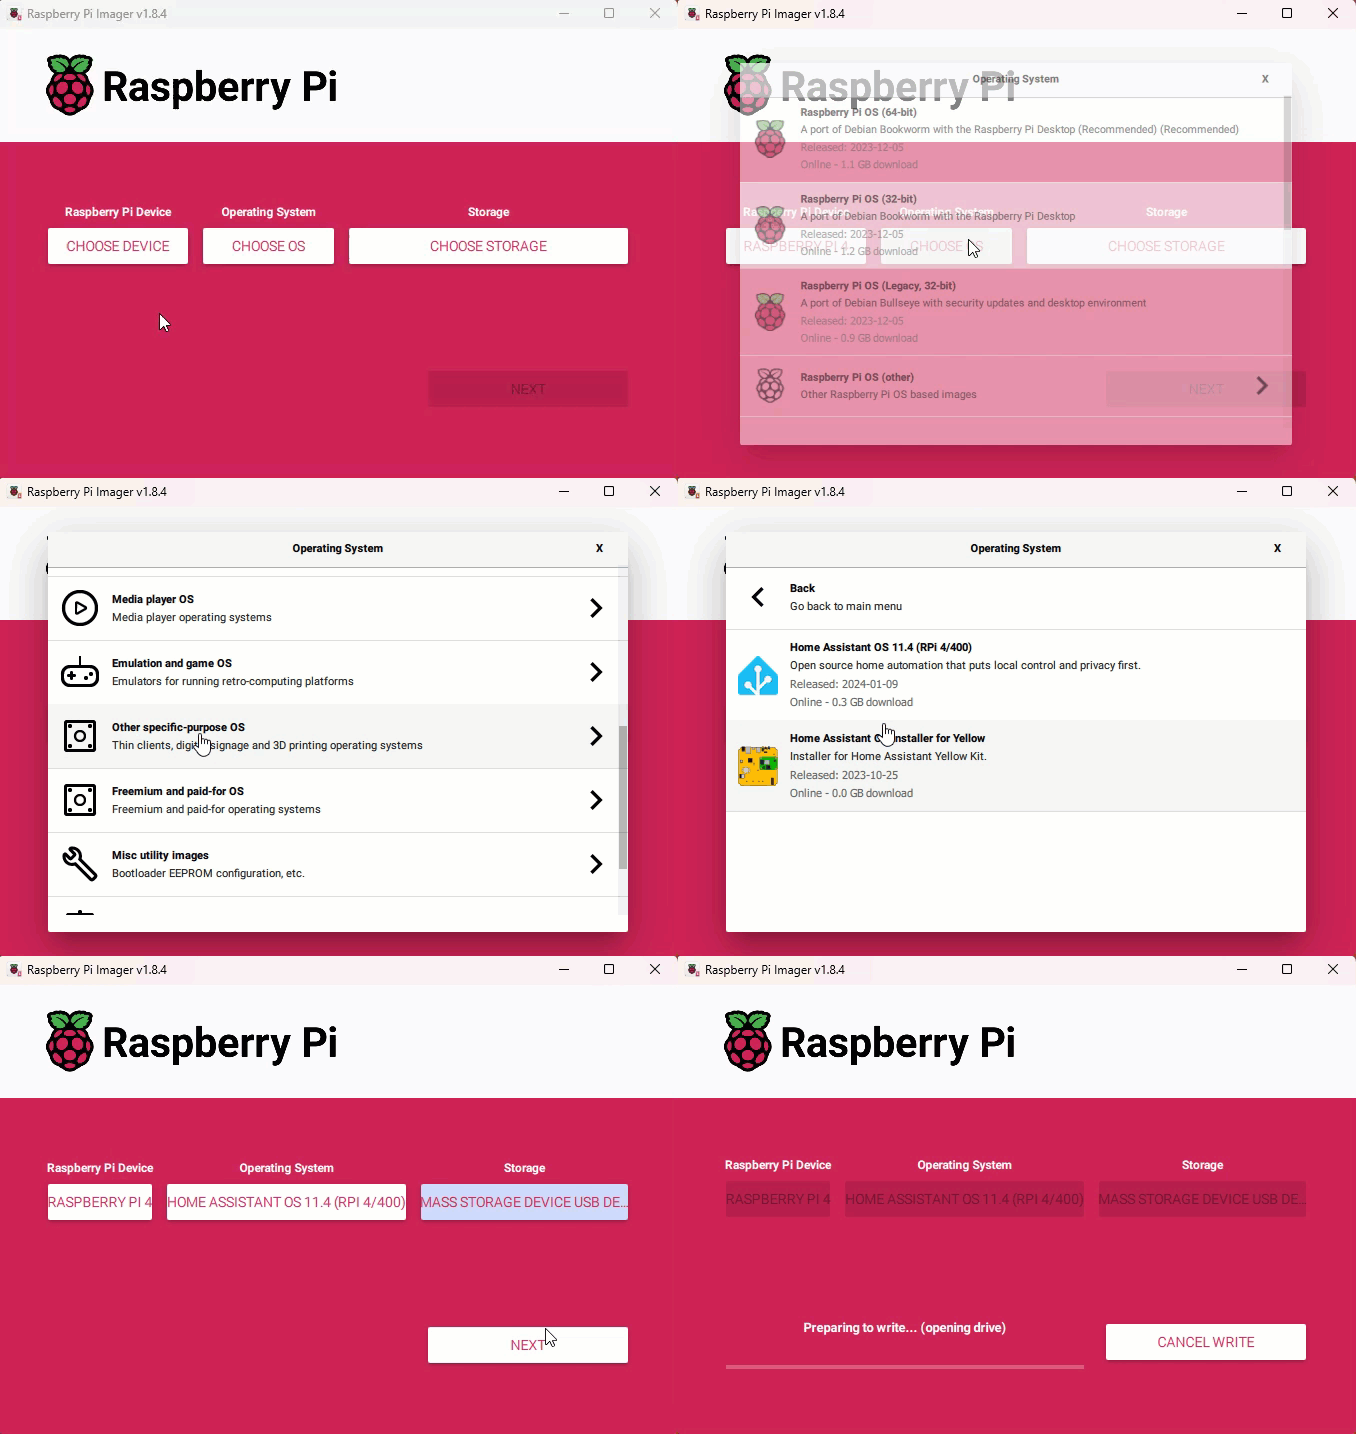
- Open the Raspberry Pi Imager and select your Raspberry Pi device.
- Insert the SD card into the computer. Note: the contents of the card will be overwritten.
- Choose the operating system:
- Select Choose OS.
- Select Other specific-purpose OS > Home assistants and home automation > Home Assistant** OS (RPI**).
- Choose the Home Assistant OS that matches your hardware (RPi 3 or RPi 4).
- Choose the storage: The SD card you just inserted into the computer.
- To start the process, select Next.

- This will wipe the SD card and Write the installer onto the SD card. Wait for verification to complete.
- Eject the SD card.
START UP YOUR RASPBERRY PI
- Insert the SD card into your Raspberry Pi.
- Plug in an Ethernet cable and make sure the Raspberry Pi is connected to the same network as your computer.
- Connect the power supply to start up the device.
- Grab a beer or a coffee while you wait for the first startup and install to complete.
ACCESS HOME ASSISTANT
Within a few minutes after connecting the Raspberry Pi, you will be able to reach your new Home Assistant.
- In the browser of your desktop system, enter homeassistant.local:8123, OR homeassistant:8123.
Depending on network configuration, you might need to access Home Assistant on `http://X.X.X.X:8123` (replace X.X.X.X with your Raspberry Pi’s IP address). - The times on this can be a bit unpredictable as internet speed, SD card speed and versions of the PI makes it a bit hard to give a specific timeline on how long this will take. Longer than 15 minutes then you may need to restart the process.
- If it does not show up after 15 minutes , maybe the image was not written properly.
- Try to flash the SD card again, possibly even try a different one.
- If this did not help, view the console output on the Raspberry Pi.
- To do this, connect a monitor via HDMI.
- If it does not show up after 15 minutes , maybe the image was not written properly.
Congratulations! You finished the Raspberry Pi setup!


